

Track Changes is the language of editors. As a writer, you need to speak it because, sooner or later, you will have to deal with it. This post is an introduction to the Track Changesfeature in Microsoft Word. I am a PC person, so I will be referring to how it works in the Windows operating system. If you’re one of those Mac people, then this post should still be helpful, although you may have to do some translating. (For context, here are links to two Youtube videos by Terence Jorgensen–one for PC, one for Mac–that I think you’ll find useful.)
In my version of Word (2010), there’s a row of tabs across the top of the document window. If you click onReview (2nd from the right), you’ll see the editing tool bar appear (replacing whichever one you were in before, probably Home). You’ll also see it’s divided up into sections from left to right (labels along the bottom): Proofing, Language, Comments, Tracking, Changes, Compare, and Protect. I’ll just be looking at the buttons in the Comments, Tracking, and Changes sections.

First off, in the Tracking section, you’ll see a button labelled Track Changes. Hover your cursor over it and you’ll see that either the top or bottom half turns yellow. That’s because it’s a split button: click on the top half (with the page and pencil icon) and you toggle the Track Changes feature on or off for the entire document. If you click on that part, both halves turn yellow signifying that Track Changes is on.
Click on just the bottom half and you get a dropdown menu allowing you to modify the Track Changessettings. The first option on this dropdown menu is merely a duplicate Track Changes toggle switch. Below it is the Change Tracking Options feature. This opens a window where you can customize whatTrack Changes looks like. Feel free to play around here a bit and get to know your options. Jorgensen does a great job explaining this part in his videos, so go there if you want to learn more about that. I mostly just use the default settings because they work fine for me.

The third and final choice on the Change Tracking Options menu deals with the user name. This is useful when you have multiple editors or authors working on a document. Or if you use a pen name or alias. To use this feature just enter the appropriate user name and initials in the boxes under Personalize Your Copy of Microsoft Word and click the Okay button at the bottom right. Keep in mind that doing this changes the author name for everything you do in Word from that moment forward. It’s not specific to the document you’re working on. So be sure it’s reset to the appropriate name after you’re done.
Next to the Track Changes button(s) you’ll see a stack of three buttons with little down-pointing arrows next to them: Final: Show Markup, Show Markup, and Reviewing Pane. Click on any of these to get their dropdown menus. Starting at the top, click on Final: Show Markup to see your four choices for viewing your document. These allow you to compare and contrast your original draft with your “final” draft (the one that has the changes in it).

The middle button, Show Markup, allows you to choose what changes, including comments, you see on the screen. Simply check or uncheck the boxes to customize what changes are highlighted. I like to keep them all in view.
And rounding out the bottom comes the Reviewing Pane button. Click on the left side where the words are and you get a list of all the changes that have been made. This can be useful when trying to decipher and navigate a heavily edited page. If you click on the little down-pointing arrow section of the Reviewing Panebutton, you can select a vertical or horizontal layout for your list of changes and comments.
Next, let’s move on to the mechanics of making changes and comments. Again, the videos give a nice visual of what editing and commenting looks like.
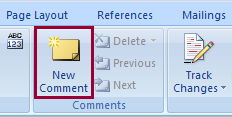
To make a comment in the margins of a document (as opposed to an actual change), simply click on the New Comment button in the Comments section of the tool bar (just to the left of the Tracking section). The three buttons to the right of New Comment (Delete, Previous,Next) remain grayed out and unusable until the document actually contains comments. Once you start commenting they “light up” and activate. They’re mostly self-explanatory, except Delete is a split button. Click on the down-pointing arrow and you’ll get a drop down menu that lets you choose to cut the comment you currently have highlighted, all comments shown (I have no idea what this does or even means; it’s always grayed out as far as I can tell), or all the comments in the document.

On the other side of the Tracking section, you’ll findChanges. This section contains the buttons you’ll use the most as a writer receiving feedback. Again, these are pretty self-explanatory, except to note that both Acceptand Reject are split buttons with tiny dropdown menus giving you more options.
There are two points the videos don’t touch on that I want to close with. First, if you right-click on a change or comment in the body of the document, a small window will pop-up. In there you’ll see Accept and Reject buttons. This is just another way to navigate the changes and comments. And lastly, never forget the Undo button in the very upper left corner next to the floppy disc (Save) icon. You can always hit that and make whatever horrible mistake you just made go away.

Happy revising!